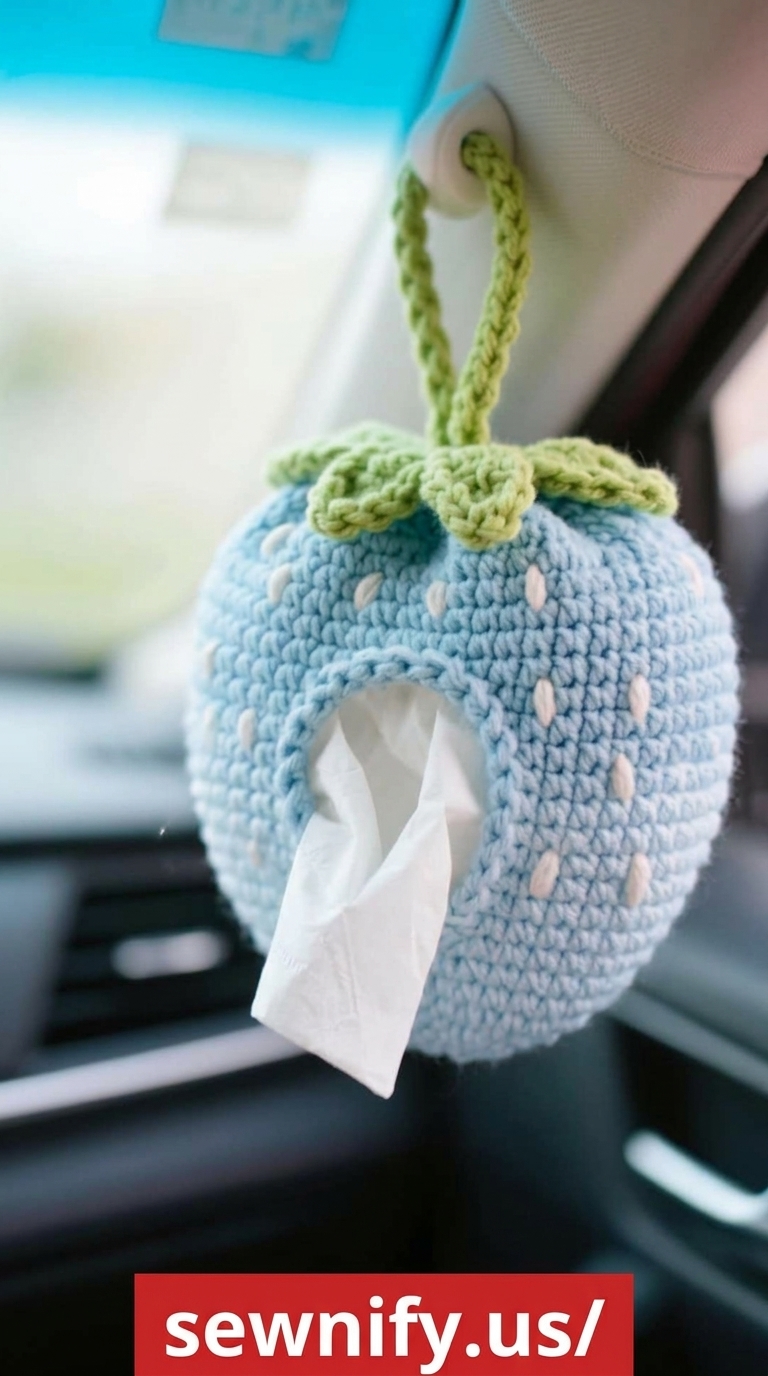
Hanging Light Blue Strawberry Car Tissue Dispenser
The Hanging Light Blue Strawberry Car Tissue Dispenser is a delightful addition to any vehicle, combining functionality with a touch of whimsical charm. This unique accessory not only holds tissues but also enhances your car’s interior decor. In this article, we will guide you through the entire process of sewing this adorable item, from selecting the right materials to styling it in your car. Whether you’re a beginner or an experienced sewer, this project is sure to delight.
Materials and Tools Required
Before we dive into the sewing instructions, let’s gather the necessary materials and tools. You’ll need:
- Fabric: Light blue cotton fabric (for the main body), strawberry-printed fabric (for accents)
- Thread: Matching thread in light blue and red
- Scissors: Fabric scissors for clean cuts
- Sewing machine: For efficient stitching
- Pins: To hold pieces together while sewing
- Measuring tape: For accurate measurements
- Iron: To press your seams
Make sure you have everything ready before you start. More about selecting fabrics can be found here.
Fabric Recommendations
When choosing fabric for your dispenser, look for materials that are both durable and aesthetically pleasing. Cotton is an excellent choice due to its breathability and ease of sewing. You may also consider:
- Cotton blends for added durability
- Canvas for a sturdier structure
- Quilted fabric for a cushioned effect
Opting for a fun strawberry print for the accent pieces will add a playful touch to your dispenser.
Step-by-Step Sewing Instructions
Now that you have your materials ready, let’s get started on sewing your Hanging Light Blue Strawberry Car Tissue Dispenser!
Step 1: Cutting the Fabric
Measure and cut out the following pieces from your light blue cotton fabric:
- Two rectangles measuring 10″ x 12″ for the main body
- One rectangle measuring 4″ x 10″ for the top opening
- Two small strawberry fabric pieces for embellishment (approximately 3″ x 3″)
Ensure your pieces are cut accurately for a neat finish. Use a sharp pair of fabric scissors for best results.
Step 2: Preparing the Pieces
Take the two rectangles for the main body and place them right sides together. Pin along the sides and bottom, leaving the top open. Use a straight stitch to sew along the pinned edges with a 1/4″ seam allowance.
Next, turn the fabric right side out and press the seams with your iron for a crisp finish.
Step 3: Creating the Top Opening
For the top opening, fold the edges of the rectangle 1/4″ inward and press. Then, fold again by 1″ and pin. Sew along the bottom edge of the fold to secure it in place. This will create a clean opening for your tissues.
Step 4: Attaching the Strawberry Accents
Take your strawberry fabric pieces and sew them onto the front of your dispenser for decorative flair. You can use a basic appliqué technique to attach them, ensuring they are securely stitched down.
Step 5: Assembling the Dispenser
Insert the top opening into the main body, aligning the seams. Pin in place and sew around the top edge to secure everything together. Make sure to sew at least 1/2″ away from the edge to secure the structure of the dispenser.
Step 6: Final Touches
Finally, trim any excess threads and give your dispenser a final press with the iron. This will help to set the shape and give it a polished look.
Helpful Sewing Tips and Common Mistakes to Avoid
While sewing your Hanging Light Blue Strawberry Car Tissue Dispenser, keep the following tips in mind:
- Measure Twice, Cut Once: Always double-check your measurements before cutting to avoid wasting fabric.
- Use Quality Thread: Invest in good-quality thread to prevent breakage during sewing.
- Don’t Rush: Take your time with each step, especially when sewing curves or intricate designs.
- Keep Your Machine Clean: Regularly clean your sewing machine to maintain its performance.
- Test Your Stitch: Always test your machine’s stitch on a scrap piece of fabric before starting on your project.
How to Wear and Style This Clothing Item
While the tissue dispenser is not a clothing item, it can be styled in your car to complement your overall aesthetic. Consider placing it:
- On the back of your headrest for easy access
- On the center console for a decorative touch
- By the passenger side door for quick tissue access
Furthermore, coordinate it with other light blue or strawberry-themed accessories in your car, such as seat covers or steering wheel covers, to create a cohesive look.
Outfit Ideas for Different Occasions
Though the focus is on the tissue dispenser, let’s explore some outfit ideas that could accompany a fun, colorful car accessory:
- Casual Day Out: Pair a light blue sundress with white sneakers for a relaxed look.
- Picnic Date: A strawberry-printed blouse with denim shorts will tie in beautifully with the theme.
- Road Trip: Opt for a comfortable outfit, such as a light blue hoodie and leggings, for long drives.
Care and Maintenance Instructions
To keep your Hanging Light Blue Strawberry Car Tissue Dispenser looking fresh:
- Spot clean with mild detergent as needed.
- Avoid machine washing to preserve the shape and design.
- Store in a cool, dry place when not in use.
FAQ
What is the best fabric for a car tissue dispenser?
Cotton is recommended due to its durability and ease of cleaning. For a sturdier option, consider canvas.
Can I wash the tissue dispenser?
It is best to spot clean the dispenser rather than machine wash it to maintain its shape and design.
How do I attach the dispenser in my car?
You can hang the dispenser on the back of a seat or place it on the center console for easy access.
What kind of sewing machine should I use?
A basic home sewing machine is sufficient for this project. Ensure it has a straight stitch option.
How can I customize my dispenser?
You can add embellishments like patches, embroidery, or different fabric accents to make it unique.
Is this a beginner-friendly project?
Yes, it is suitable for beginners with basic sewing skills, such as straight stitching and cutting fabric.
Conclusion
The Hanging Light Blue Strawberry Car Tissue Dispenser is a fun, functional project that adds a personal touch to your vehicle. By following these detailed instructions and tips, you can create a stylish accessory that is both practical and charming. Happy sewing!